Sunday, 22 April 2012

8th week - IR sensor (infra red)

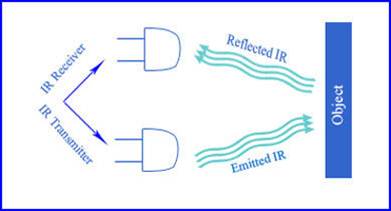
 figure 1 ; Hardware

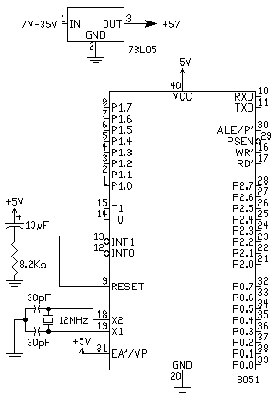
 figure 2 : IR schematic
       On this 8th week, I will discuss about how the IR sensor is working and what is the component that I use. By refer the above pictures, it shows basic component and how the sensor functioning. Why I'm choosing this sensor?
  •  Low power requirements with  simple circuitry. 
  • There is no special or proprietary hardware is required
  • Can be incorporated into the most integrated product.


Saturday, 21 April 2012

7th week - Understanding microcontroller

Week 7 is our phase test week. We are not able to meet our advisor since we are busy with our exam. Thus, we still doing our research for this project. We start to understand the microcontroller interfacing. We will use PIC 16F877A for our project. There's a little brief about microcontroller and simple circuit.


Figure 1 : Basic setting of PIC 16F877A


Figure 2 : Basic Wiring Servo Motor and Microcontroller

We are using Proteus to do wiring of the project and MPlab software to write the program. We have started to write our source code and still in learning process.

Monday, 2 April 2012

6th week - Fire detection


Fire detection scheme


To detect the flame from the candle the team thought about implementing a motion detector to detect the wavelength of the flame. I have decided on using an IRPD (infrared proximity detector). With this the robot would be a ble to sense an object in the front left, front center, and front right. in order to detect the flame we will need to calibrate it to detect the flame of a candle. Another way, which we just recently found out about, is to use a silicon photodetector wi th a long-pass filter and calibrate it to detect candlelight.
                                                          IRPD (infrared proximity detector)
I
                                                   Signal spread of the detector

When the candle flame is spotted in the range of this detector it the robot will be able to come in on the position of the flame, come closer, and put it out.


Differentation between servo and stepper motor

After a few observations and research, i still can't decide weather to choose either servo motor or Stepper motor. Both of this motor suits well in this project.

Stepper motors:

A stepper motor's shaft has permanent magnets attached to it. Around the body of the motor is a series of coils that create a magnetic field that interacts with the permanent magnets. When these coils are turned on and off the magnetic field causes the rotor to move. As the coils are turned on and off in sequence the motor will rotate forward or reverse. This sequence is called the phase pattern and there are several types of patterns that will cause the motor to turn. Common types are full-double phase, full-single phase, and half step.
To make a stepper motor rotate, you must constantly turn on and off the coils. If you simply energize one coil the motor will just jump to that position and stay there resisting change. This energized coil pulls full current even though the motor is not turning. The stepper motor will generate a lot of heat at standstill. The ability to stay put at one position rigidly is often an advantage of stepper motors. The torque at standstill is called the holding torque.
Because steppers can be controlled by turning coils on and off, they are easy to control using digital circuitry and microcontroller chips. The controller simply energizes the coils in a certain pattern and the motor will move accordingly. At any given time the computer will know the position of the motor since the number of steps given can be tracked. This is true only if some outside force of greater strength than the motor has not interfered with the motion.
An optical encoder could be attached to the motor to verify its position but steppers are usually used open-loop (without feedback). Most stepper motor control systems will have a home switch associated with each motor that will allow the software to determine the starting or reference "home" position.
Servo motors:

There are several types of servo motors but I'll just deal with a simple DC type here. If you take a normal DC motor that can be bought at Radio Shack it has one coil (2 wires). If you attach a battery to those wires the motor will spin. See, very different from a stepper already!. Reversing the polarity will reverse the direction. Attach that motor to the wheel of a robot and watch the robot move noting the speed. Now add a heavier payload to the robot, what happens? The robot will slow down due to the increased load. The computer inside of the robot would not know this happened unless there was an encoder on the motor keeping track of its position.
So, in a DC motor, the speed and current draw is a affected by the load. For applications that the exact position of the motor must be known, a feedback device like an encoder MUST be used (not optional like a stepper).
The control circuitry to perform good serving of a DC motor is MUCH more complex than the circuitry that controls a stepper motor.
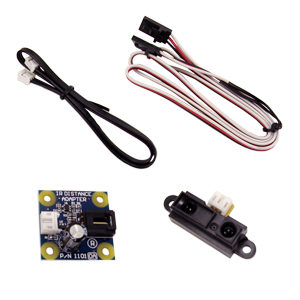
Servo motor and stepper motor

 Servo motor

Stepper motor

5th week - Circuit discussion

Its been a while after my last post. On week 5, another meeting with my advisor, we discussed about circuit. After doing a few research, we have found one suitable circuit that compatible with our robot. We have to change some component in that circuit such as water extinguisher since our mission is to build small and lighter robot. 

Furthermore, Mr Syamsul advice me to concentrate on structure first. From structure, we can determine of placing the component such as Infra Red Sensor(IR), Photo-resistor(IR) Servo Motor and circuit itself.
Next week,we will discuss about the main structure, proposal and circuit

4th week - Submission of final year project proposal


Alhamdulillah, i have submitted my proposal this week. Mr Syamsul was satisfied with the proposal. As discussed, i had decided to build a fire fighting robot using fan as extinguisher and moving using two wheel at back and sungle roller wheel infront. Mr Syamsul advise me to built a small size robot because the smaller the size of the robot, the less cost produce. Next week, we will discuss more on the robot structure and designs. I will proceed more for the research on stability, structure, circuit and programming.